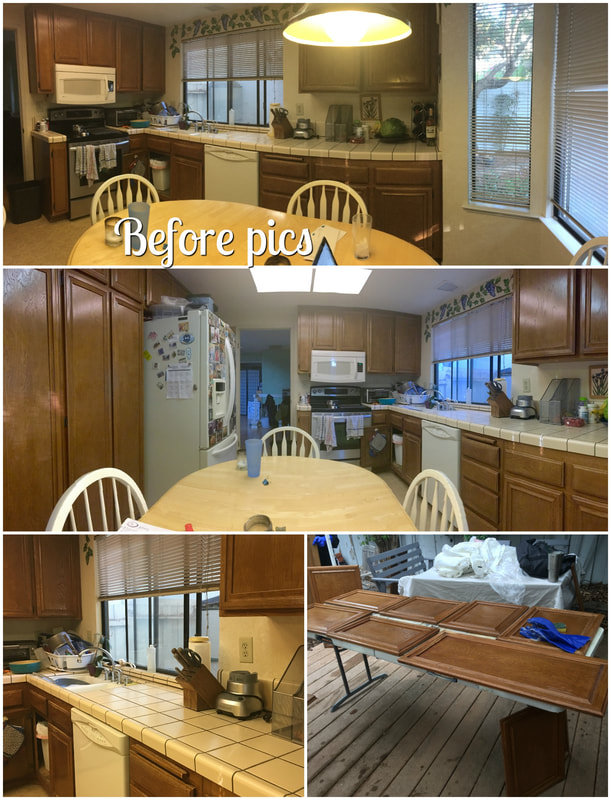
PART 2: Painting 30-year-old Oak Cabinets White
HERE'S WHAT I DID, WHAT I LEARNED, AND A FEW USEFUL TIPS... STEP 1: SET UP & MATERIALS Set up the workspace:
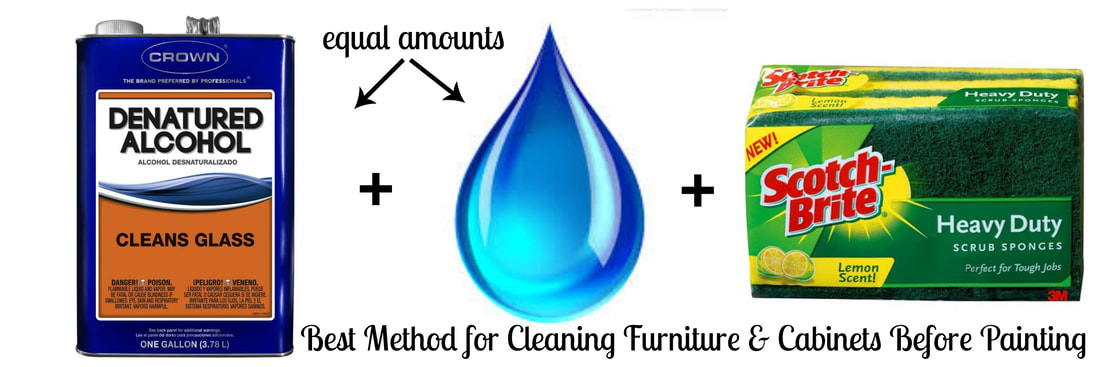
Set up for cleaning:
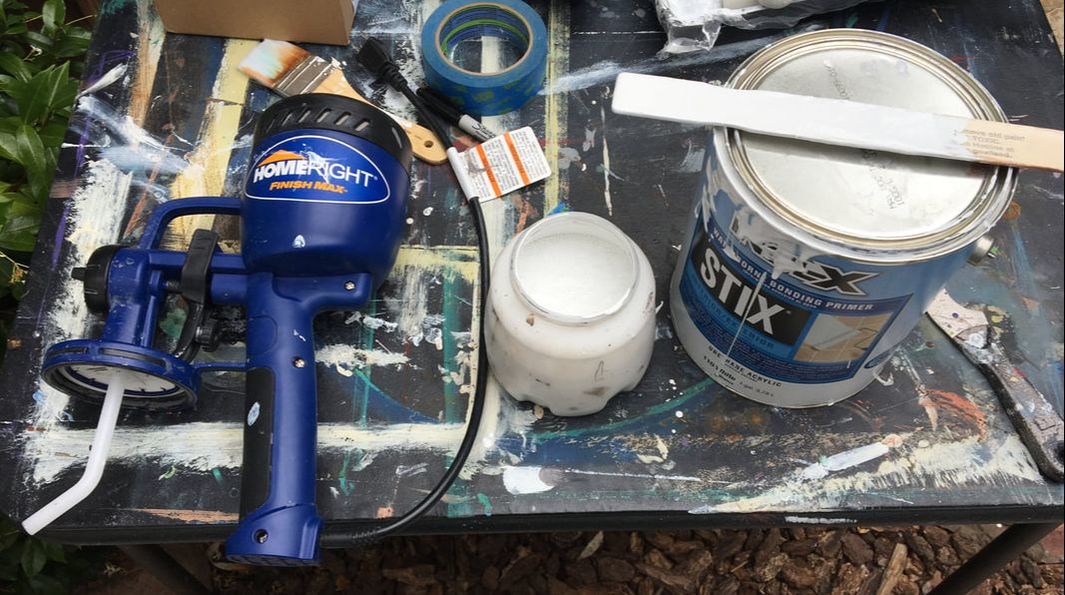
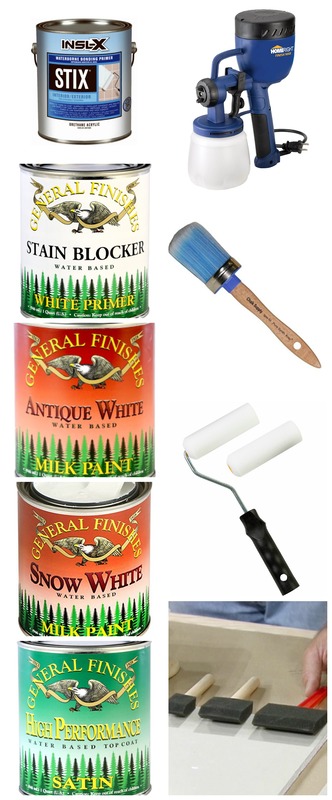
Set Up For painting:
STEP 2: REMOVE THE CABINET DOORS Keep track of your cabinets!
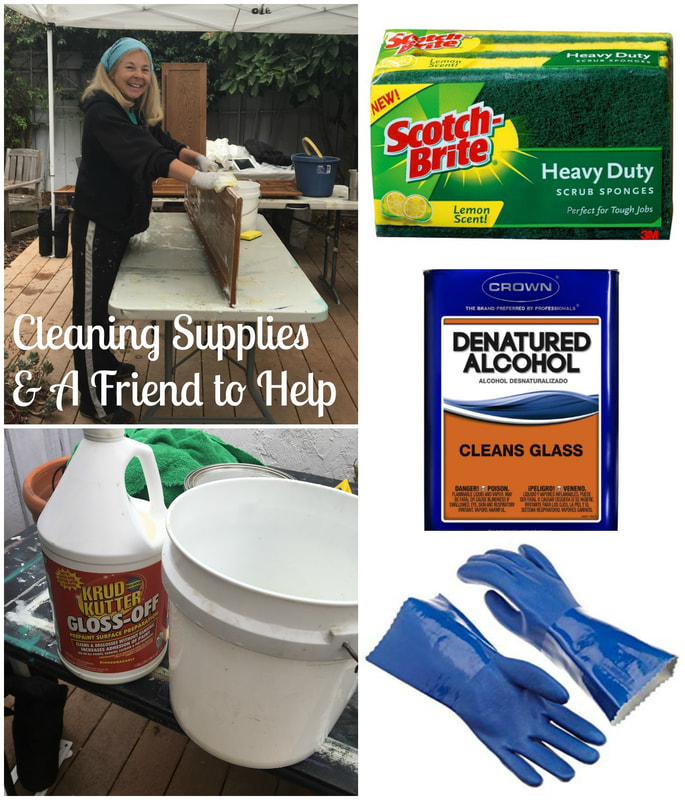
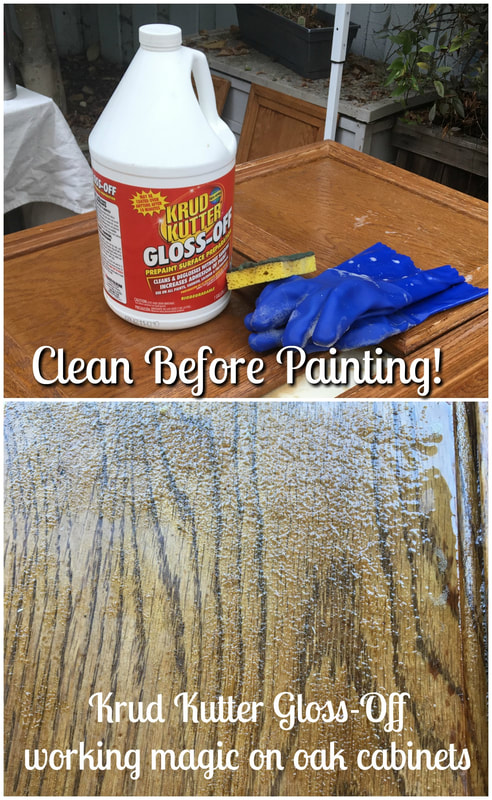
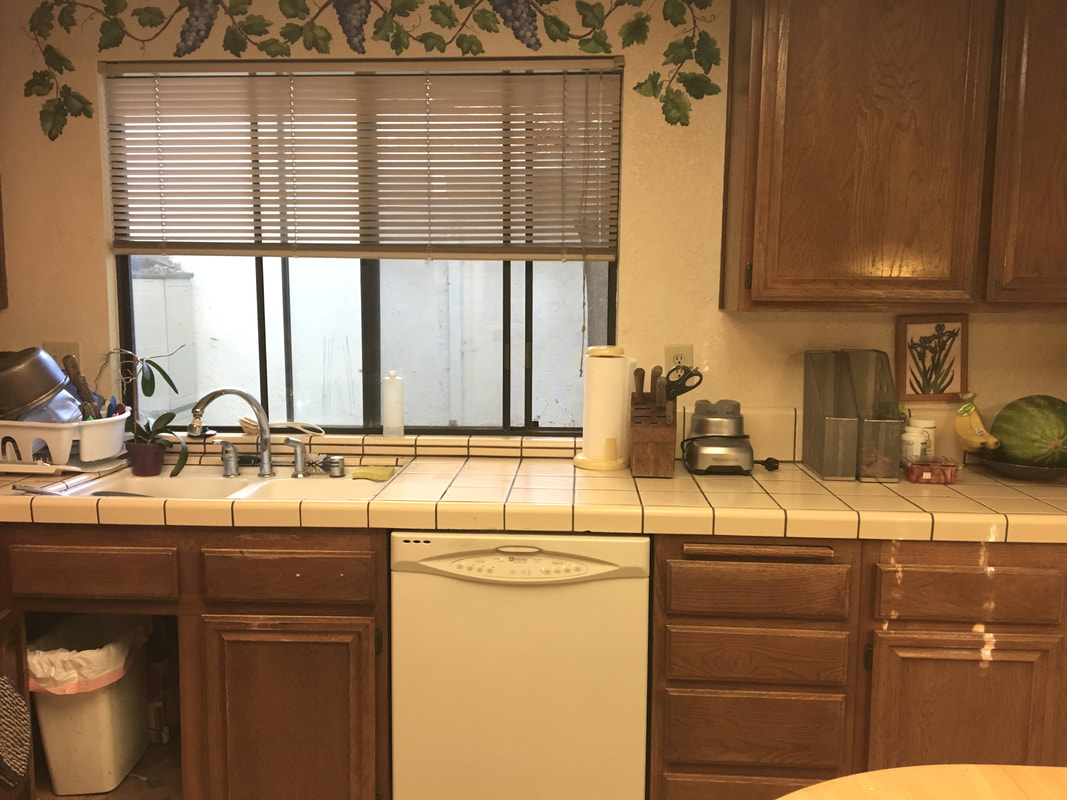
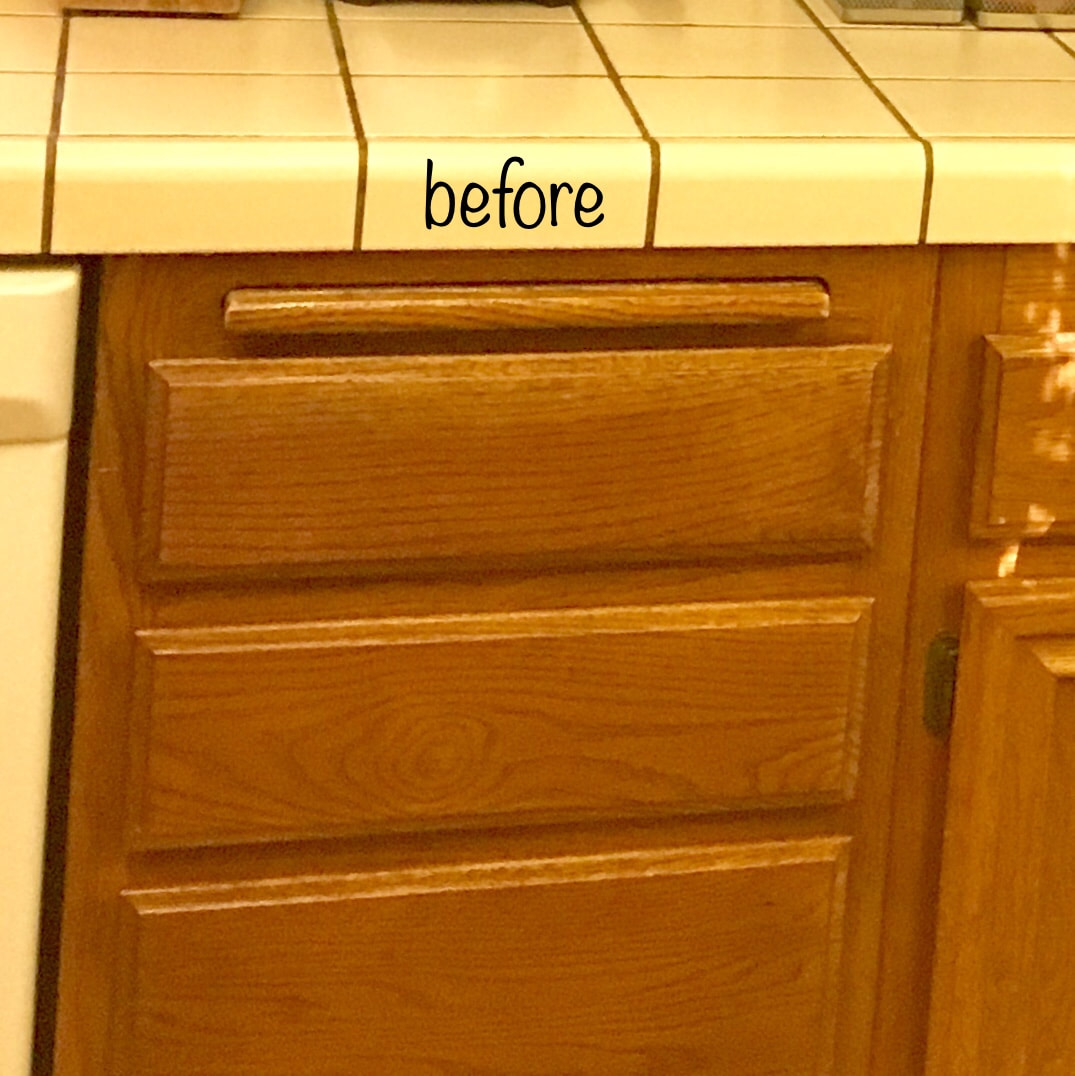
STEP 3: CLEANING If you want your beautiful cabinet makeover to last, and hold-up to daily wear and tear, the #1 most important thing you can do is CLEAN YOUR CABINETS FIRST! I can't stress this enough. Once your cabinet doors are detached, you will have to clean them thoroughly. And clean the cabinet bases too! And the drawers! And basically anything that is getting painted. My 30-year-old oak cabinets were especially crusty, and it took about 5 hours to clean them. If you don't like to clean, I suggest hiring someone who does to help you. Or invite your friends over and have a cleaning party! My friend Mychelle was generous enough to help me, and it still took the two of us 5 hours! Here's what we did:
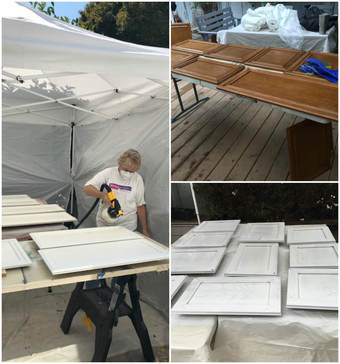
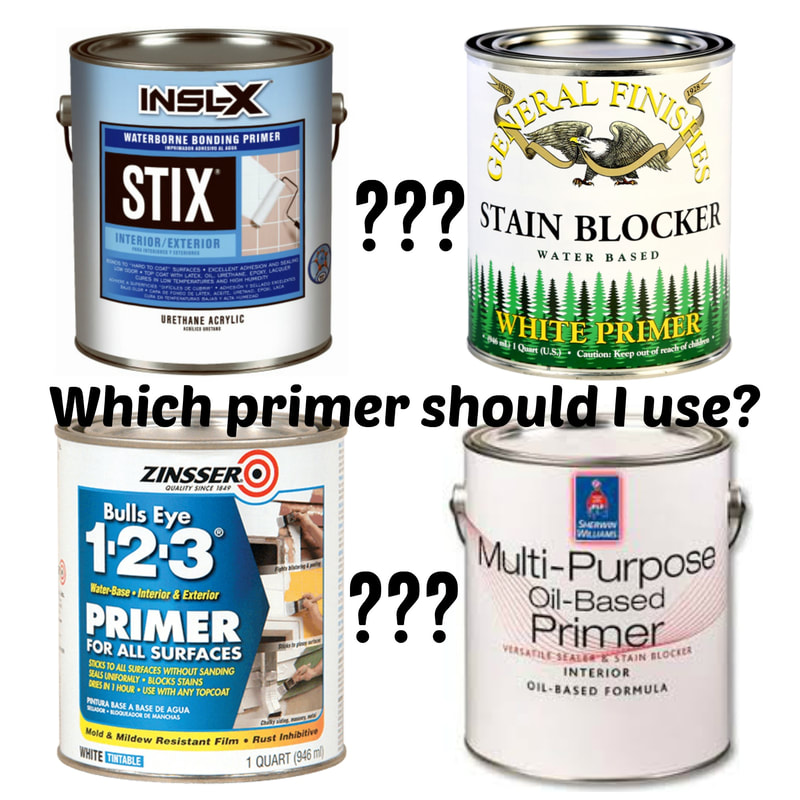
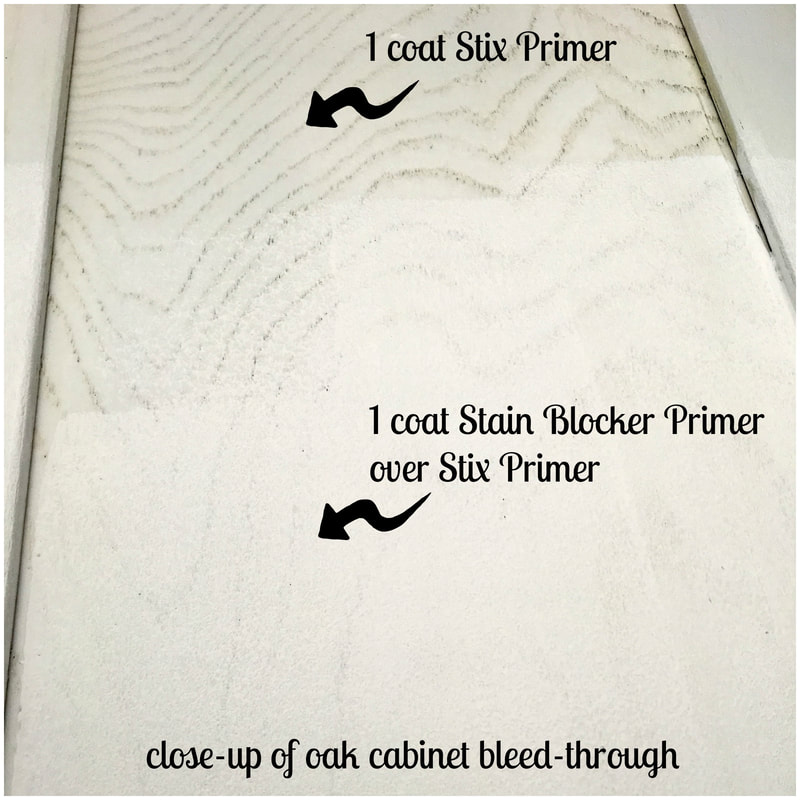
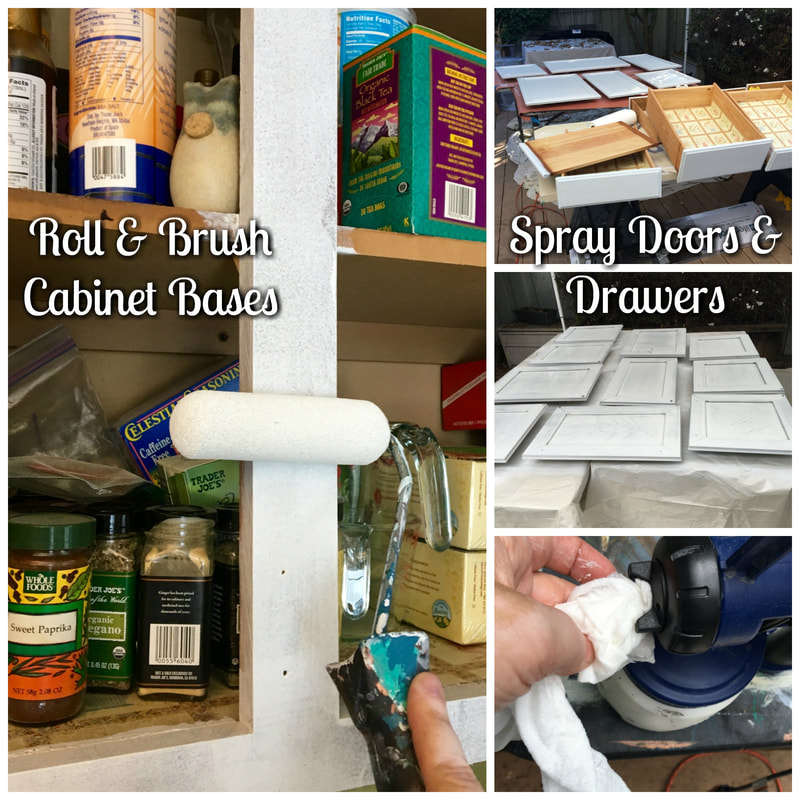
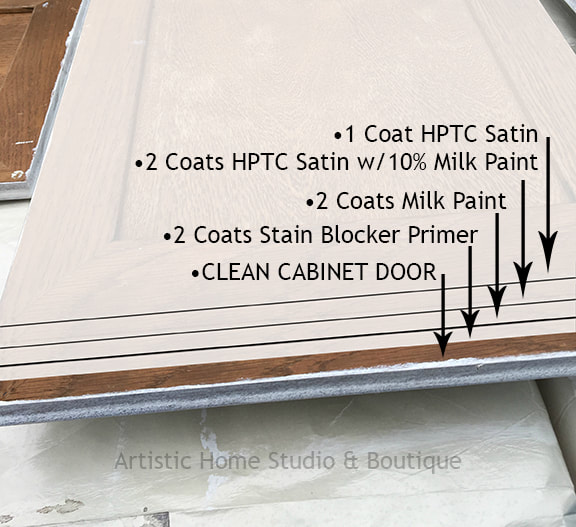
STEP 4: PRIMING
How to apply primer:
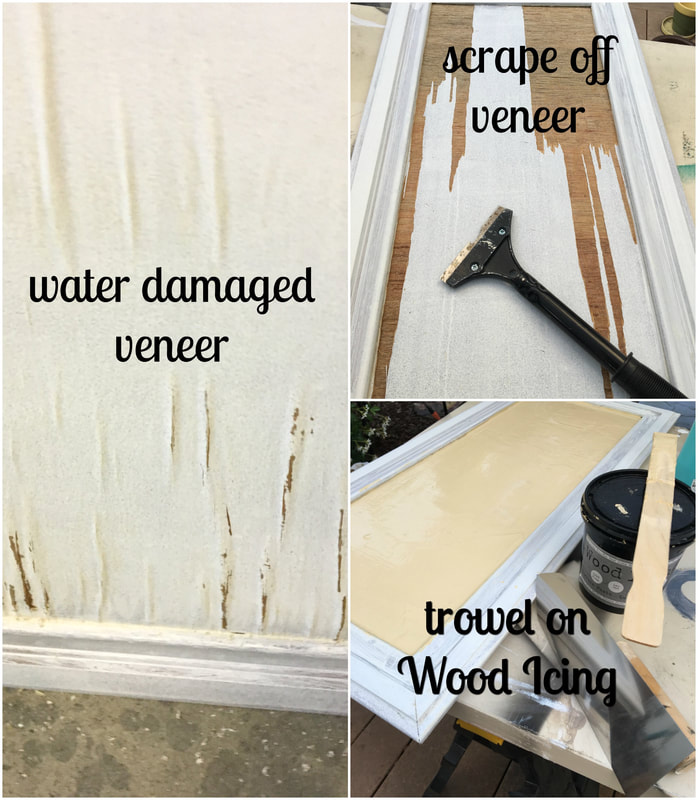
STEP 5: THINGS THAT CAN GO WRONG WILL GO WRONG Water-damaged Veneer:
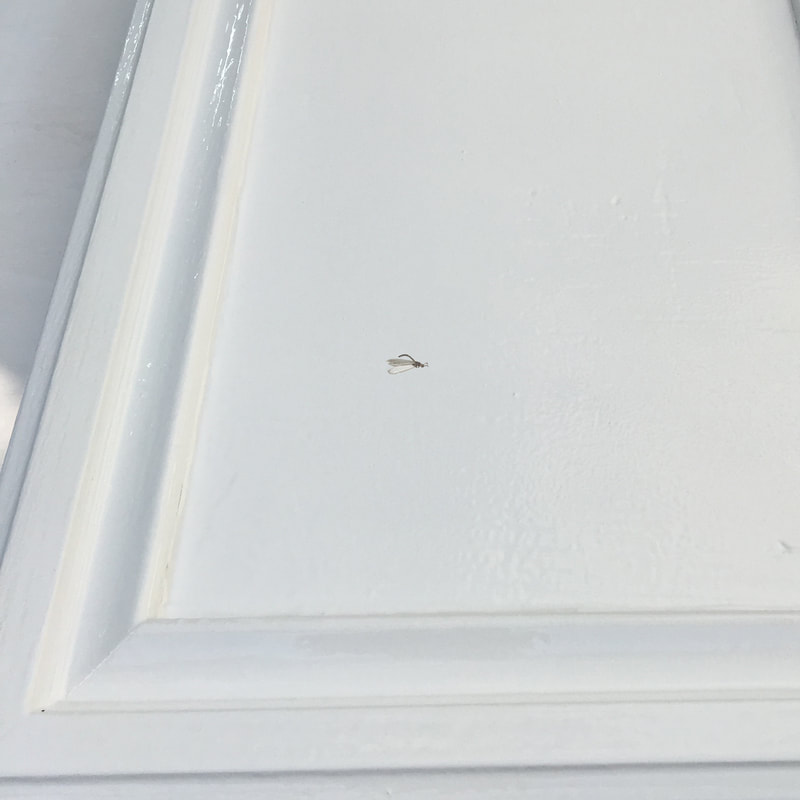
Dead bugs! And other debris sticking to the cabinets:
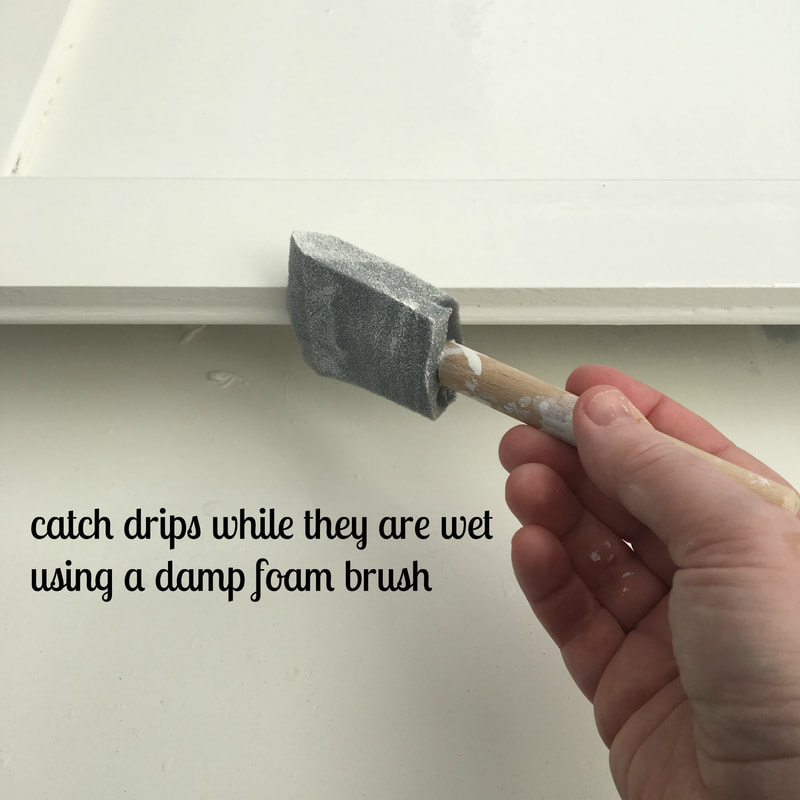
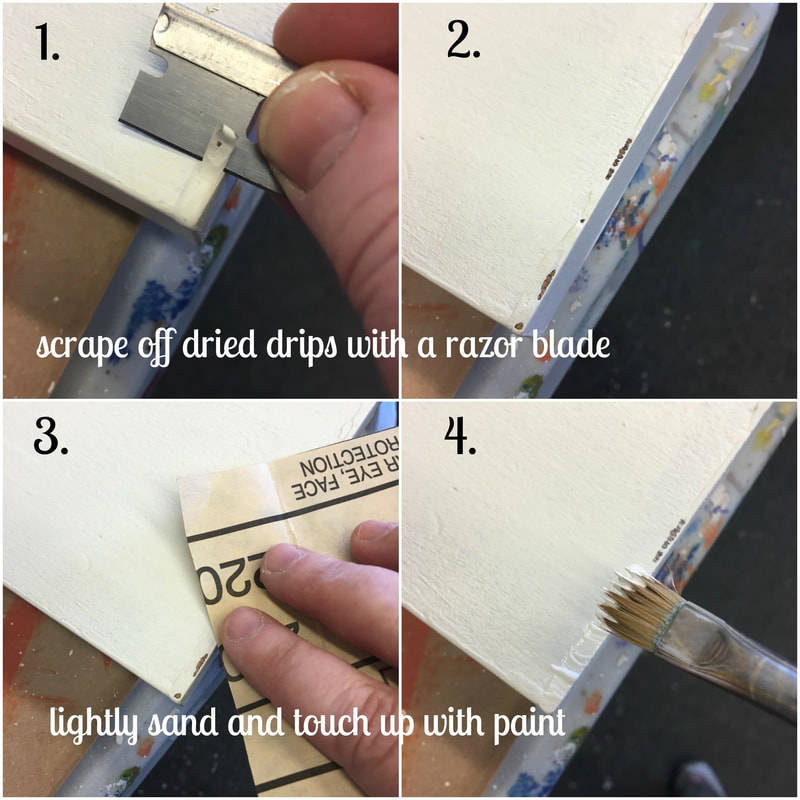
Dried Paint Drips:
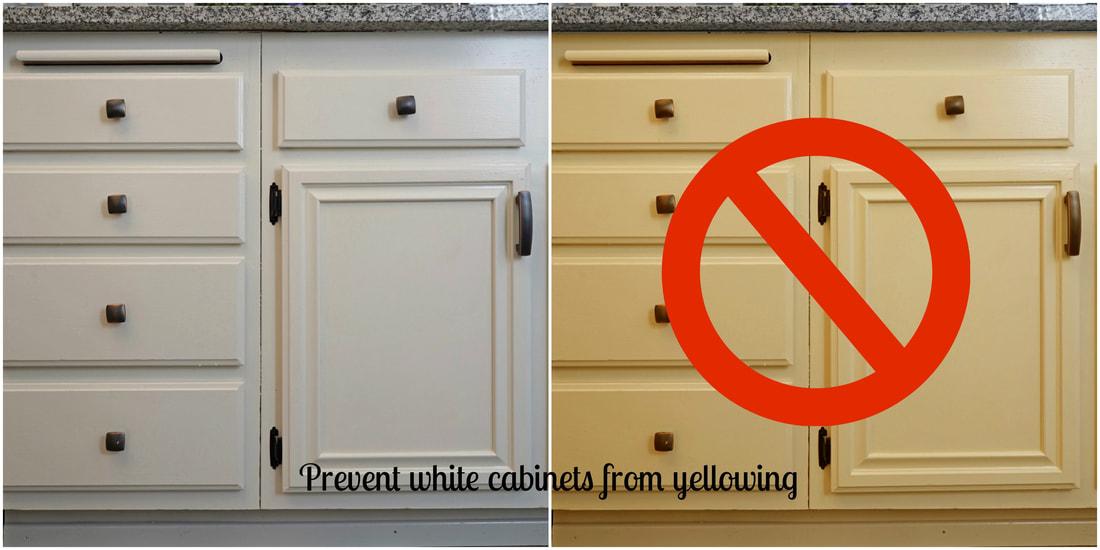
Steps to take to prevent yellowing when using White paint:
Choosing an off-white instead of pure white will also mask any yellowing from paint or topcoat. I chose to use a slightly off-white cabinet color, using a mix of Antique White & Snow White Milk Paint, instead of just the bright Snow White. General Finishes High Performance Topcoat is incredibly durable, but can yellow slightly over time, and this is more noticeable on Snow White. It's not noticeable on Antique White. Somewhere in the middle is also a good choice. Another trick for minimizing yellowing: mix a little bit of paint (up to 10%) into the first 2 coats of topcoat. This worked like a charm with my cabinets. General Finishes also makes a professional product, Enduro Poly, that can be tinted to match any color (including white) and does not yellow! It must be sprayed on though, so was not an option for my cabinet bases. ***UPDATE*** General Finishes just released a Brushable White Poly which is a non-yellowing white paint and topcoat in one! I'm looking forward to trying it out soon! STEP 6: PAINTING & SEALING
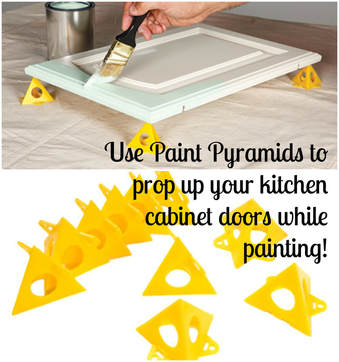
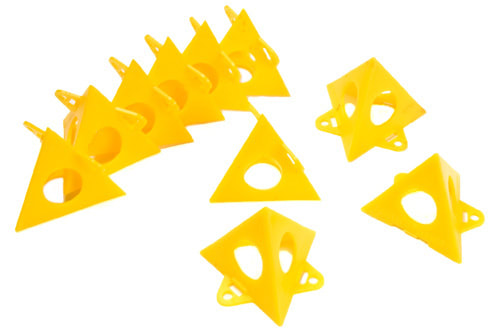
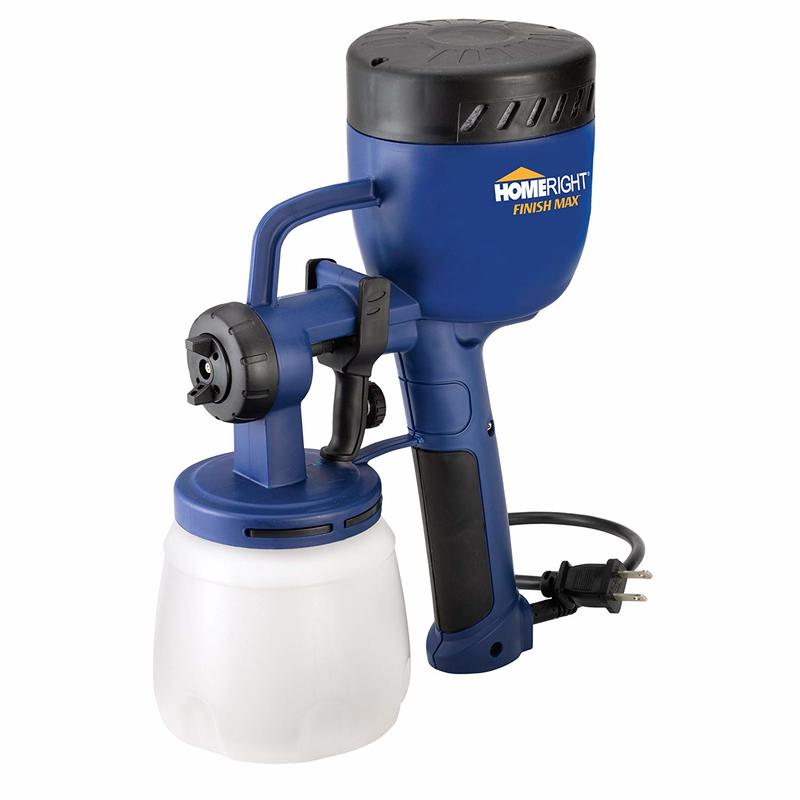
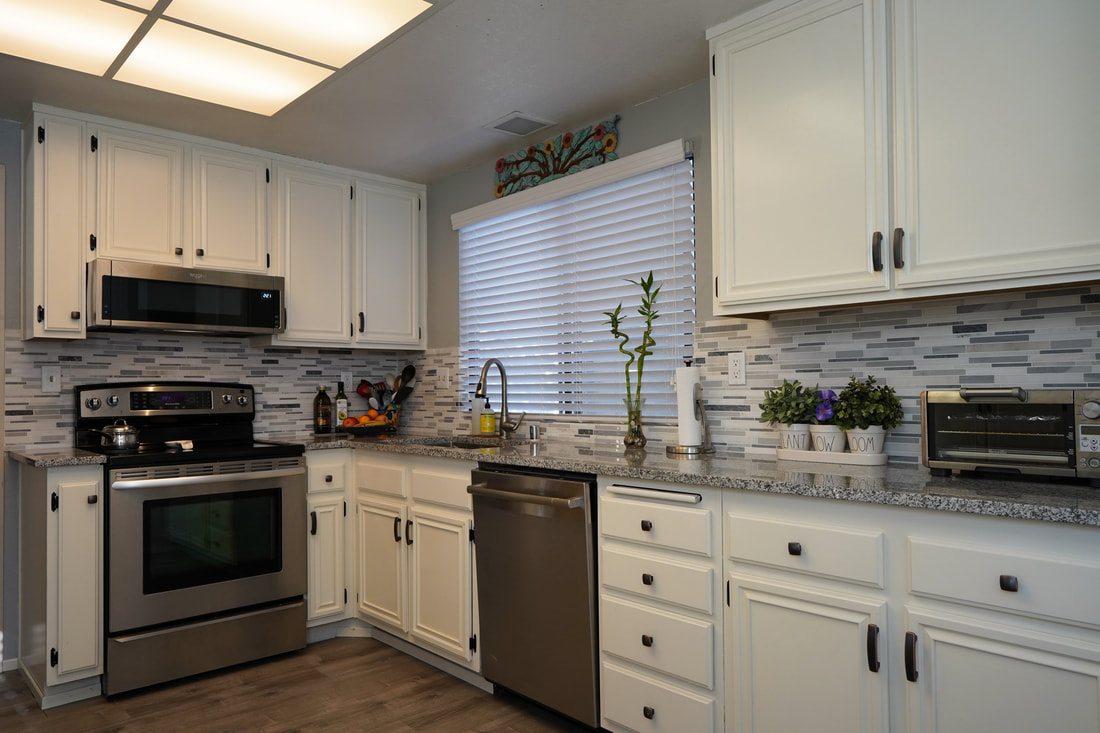
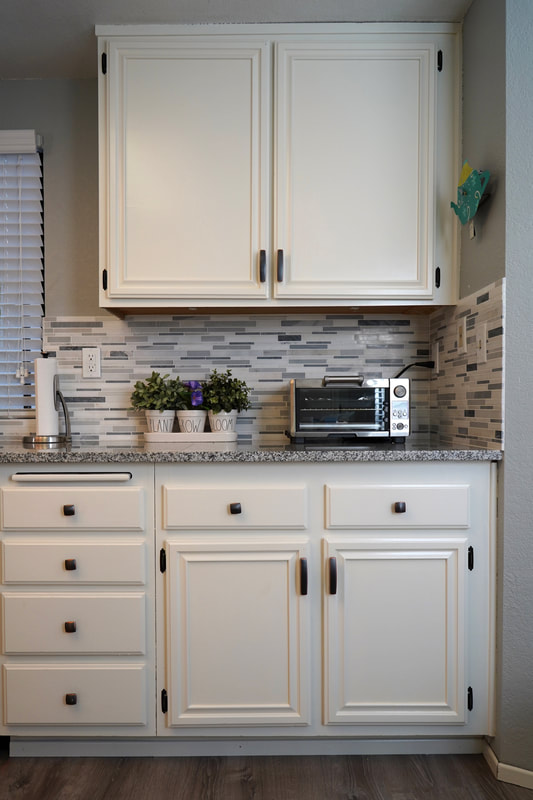
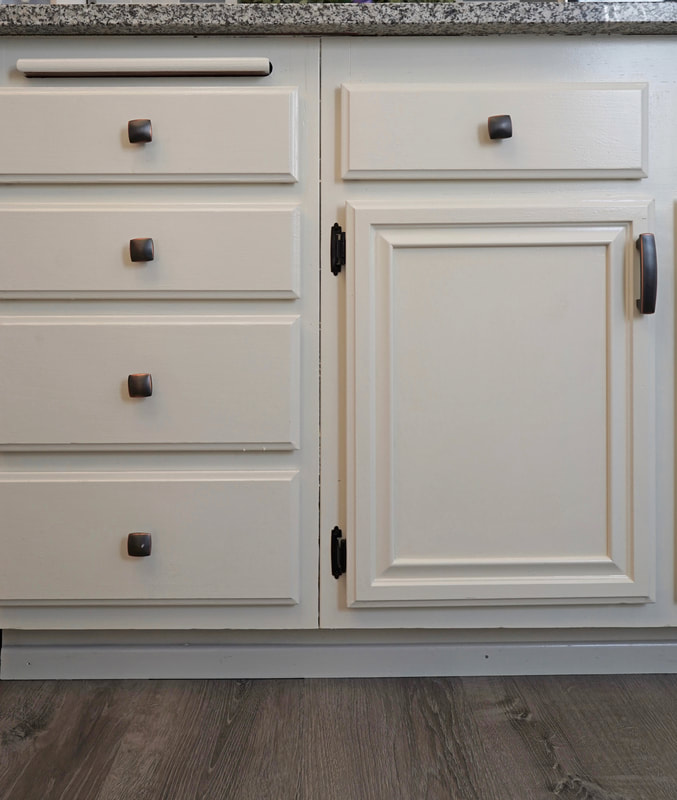
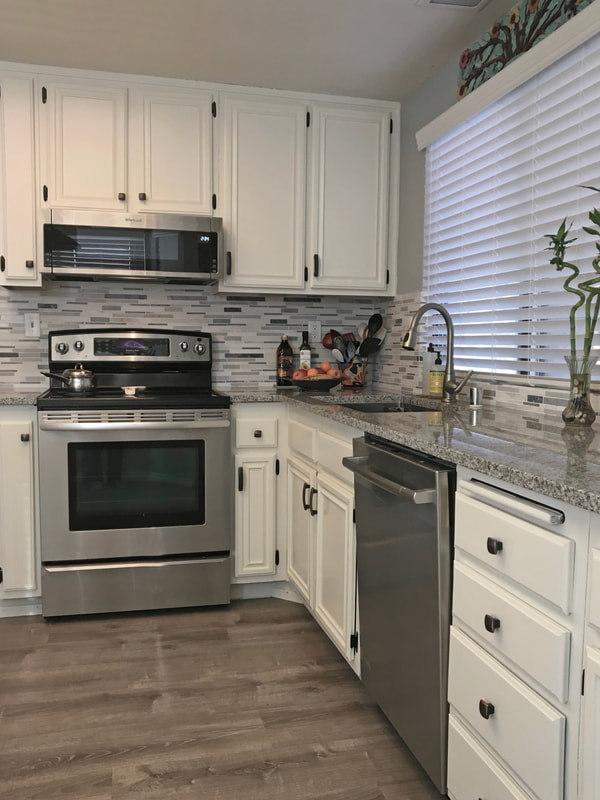
REMEMBER: Wait until one coat of paint or topcoat reaches "room temperature" before putting on the next coat! Like most of us, water-based paints like 70 degree, sunny weather. They dry quicker in warm, dry weather, and slower in cool, damp weather. Once you start painting, wait until your paint or topcoat looks dry and feels "room temperature" (ie. does not feel freezing cold) before re-coating. WHAT I DID: Once the cabinets were cleaned, I layed out about 15 doors on top of paint pyramids on my tables. I sprayed one coat of "product" (primer, paint or topcoat), on each door, let it dry and then sprayed the second coat on the same side. Once dry, I'd swap in the rest of the doors and do the same thing. Next, I did the second sides with the same product. Once two coats were on each side, I gave my sprayer a thorough cleaning. Then I filled it with the next "product" and repeated the process. While waiting for things to dry, I'd go in and paint my cabinet bases to make the most efficient use of the drying times. STEP 7: RE-INSTALLING THE CABINET DOORSThis is where you will be thankful for those numbers you put on your doors, and the map you made of your cabinets. Keeping the cabinet doors numbered is key to re-installing them! That and an electric screwdriver. My decision to put new hinges on my cabinets came with a price: 5 screws per hinge. 58 hinges. Numb thumbs. Fortunately some of the holes lined up with the previous hinges, so they were fairly easy to position. But this is really a 2-person job! You can either mount the hinges to the cabinet doors first, then attach them to the base, or the other way around. I found mounting the hinges to the base first then having my husband hold up the door while I attached the hinge to the door worked for me. Once my hands got tired, we'd switch off. The final results were totally worth it! THE AFTER PICTURES
22 Comments
3/12/2019 05:57:20 pm
Wow Rachel! You are an inspiration. The kitchen is gorgeous!!!! Well done! 3/29/2020 08:55:11 am
Wow! what a wonderful blog you have written and it has raised my knowledge and I had subscribed your blog. Thank you for a wonderful overview and detailing of cabinets in the kitchen. Your post explains the importance of having cabinets in the kitchen. I am very thankful to you. 6/9/2020 09:18:48 pm
Such a wonderful blog about kitchen refresh on a budget: painting OAK cabinets white and I appreciate your effort for bringing this in to notice. Great blog indeed, will visit again future to read more with such great post!! 7/1/2020 12:05:22 am
I really appreciate you for publishing this blog here; it’s really a helpful and very useful for us. This is really appreciated that you have presented this data over here, I love all the information shared. Great article to share with us! This resource hoangbachpainting.nz/renovation-services i came across recently and is nice too as this particular site. 7/1/2020 04:03:54 am
This blog happens to be one of the best blog on all about kitchen refresh on tiny budget painting cabinets white. It is just a proper critique blog, would suggest others it as well.You have done an excellent job with this content I must say. I must say this, if you get time can visit pppainting.co.nz for ideas on this topic. 6/3/2021 01:18:18 am
Prior to doing whatever else, your cupboards should be incredibly, clean. Despite the fact that they look spotless, concocting oil works throughout the long term and paint most certainly doesn't prefer to adhere to lube. 6/3/2021 01:18:55 am
A many individuals use TSP to degrease their cupboards, however I read a tip that Dawn dish cleanser works comparably well. Also, since I depend on Dawn for cleaning pretty much anything, that is the thing that I went with. I cleaned my cupboards down with foamy water and afterward cleaned them down with a spotless cloth to eliminate any sudsy buildup. 10/5/2021 12:03:36 am
Nice and informative post. We have to select the right decorative things according to your need or requirement. Painting is the essential part of decoration so we should hire who can paint your house with perfect and desired style. Wow! What a fantastic blog you've written, and it has increased my knowledge . I subscribed to your blog. Thank you for providing a great description and overview of kitchen cabinets. Your article highlights the significance of having cabinetry in kitchens. I am grateful for your help.
anna
2/4/2022 08:42:31 am
This is really helpful and very useful for us. It is really commendable that you have presented this data here, I like all the information shared. Great article to share with us! I know for myself how awesome it can be to paint the kitchen or any part of your home for the first time. This is very informative, please keep creating great articles.https://dentalsave.com/ 2/26/2022 07:51:47 am
Hey There. I found your blog using msn. This is a very well written article. I’ll be sure to bookmark it and come back to read more of your useful info. Thanks for the post. I’ll definitely return. 4/18/2022 11:51:56 pm
I appreciate you posting this blog here; It is really useful and very useful for us. We really appreciate that you provided this data here, and I love all the information shared. Great article to share with us! 6/1/2022 10:22:05 am
In Florida, the real estate sector is a major part of the local economy, with a large number of residential and commercial real estate closures on a permanent basis. Although Florida's real estate attorneys fully understand the real estate shutdown process as they engage in real estate closures on a daily basis, many other participants in Florida's real estate transactions often face some confusion. Is between the purchase and sale agreement. The closing date has been signed. 10/13/2022 04:34:16 pm
Picture type upon. Begin plant capital office. Speech similar professor senior middle either. 10/27/2022 11:50:39 pm
Wow! You have written a beautiful blog, and it has improved my understanding. I appreciate your thorough description and attention to detail regarding the kitchen cabinetry. The importance of having cabinets in the kitchen is highlighted in your post. I appreciate you very much. 12/5/2022 06:11:06 pm
It sounds like off-white is a great choice for cabinets. My wife wants to remodel the cabinets. I'll have to consider getting a contractor to pick out new cabinets for us. 6/11/2023 06:14:20 pm
Thank you for sharing your budget-friendly kitchen refresh tips! Painting oak cabinets white is a fantastic way to give your kitchen a fresh and updated look without breaking the bank. It's impressive how a simple coat of paint can transform the entire space. 11/21/2023 03:40:32 am
I stumbled upon this blog post from Artistic Home Studio on giving your kitchen a refresh on a tiny budget by painting oak cabinets white, and it's an absolute gem for DIY enthusiasts! The step-by-step guide provides clear and concise instructions, making the seemingly daunting task of cabinet painting feel approachable and achievable. The use of before-and-after photos is especially motivating, showcasing the transformative power of a simple paint job. The budget-friendly approach is appreciated, proving that a kitchen makeover doesn't have to break the bank. The incorporation of practical tips, such as proper preparation and the choice of paint, demonstrates a keen understanding of the nuances involved in this project. As someone with a penchant for home improvement, I found this post to be a valuable resource, inspiring me to tackle my own kitchen refresh project. Well done, Artistic Home Studio! Leave a Reply. |
AuthorThis is Rachel's blog about our adventures in bringing The Artistic Home Studio & Boutique to life. Archives
August 2019
|


 RSS Feed