PART 2: Painting 30-year-old Oak Cabinets White
HERE'S WHAT I DID, WHAT I LEARNED, AND A FEW USEFUL TIPS...
22 Comments
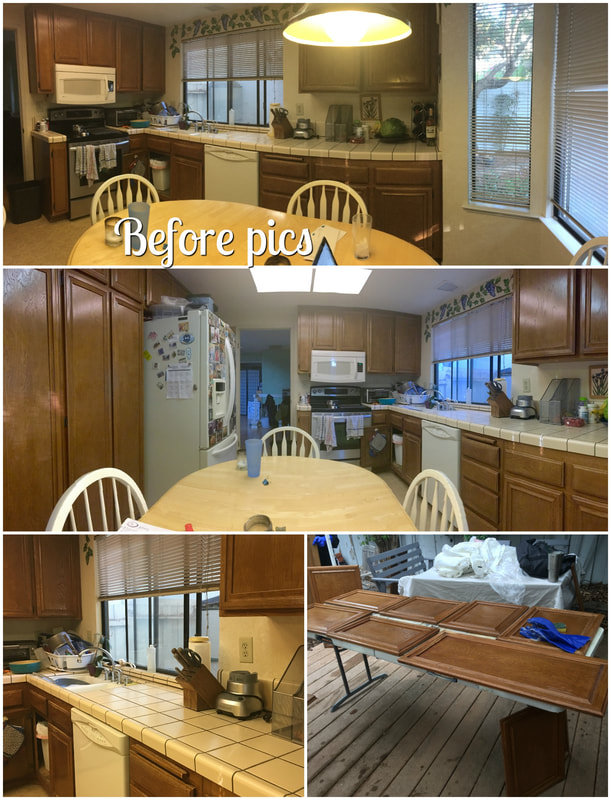
PART 1: Choosing Materials & The (tiny) BudgetIts time. I'm done talking about it (for 10+ years). And I'm excited to have some DIY fun! Plus I want to share it all and show you what I'm doing (in case you are thinking about doing something similar). Yes, CABINET PAINTING will be involved! And now... the scary (and slightly embarrassing) part: The Before Pictures. 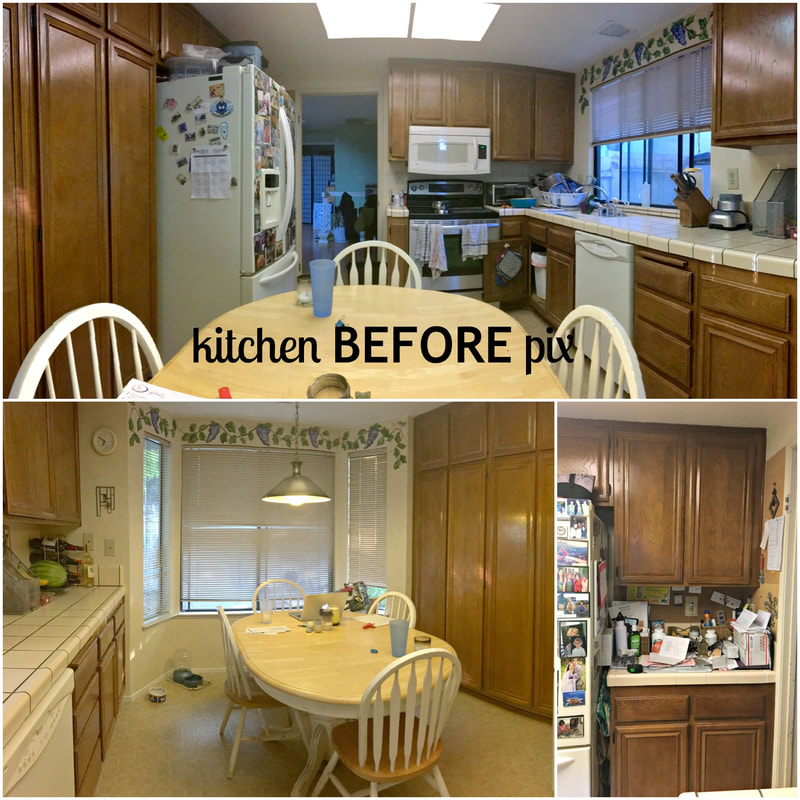 Can you say 1980's? Yup. Proof that I do not have an awesomely decorated home. Yep. Remember the story of the Cobbler's children who had no shoes? Well, I haven't gotten around to my own home because I've been busy working on painting furniture for other people and teaching students how to paint THEIR kitchens! UNTIL NOW! (I'm taking a Sabbatical from the studio/store for a few weeks.) So here it goes! CHOOSING COLORS:
I already knew that the cabinets would be WHITE. (I'm SO tired of brown cabinets.) I wanted the countertop colors to play well with the cabinets, since they are going to be touching each other all the time...
So I did some research, priced it out, and discovered Lifeproof Vinyl Flooring in Sterling Oak. It's quite affordable (under $3 per sq ft at Home Depot). Plus it has built in padding, which is great on concrete floors (aka. my kitchen)! I carried my floor swatches around for a week, trying to coordinate them with everything.
This is where I reminded myself "you're on a budget, you're on a budget, remember!" After watching one too many episodes of Fixer Upper, I originally chose Subway Tile. At $0.22 per tile, its very affordable - and looks trendy. And I brought a few home. And then decided - naaaaaahhhhh. I need something more interesting (nothing against subway tile, it's just not my taste)! So I swapped funds from another part of my budget, and voila - the $8/sqft fancy stone tiles! I had to splurge a tiny bit. (After all they weren't the reeeeeeeally expensive tiles I would have picked if I had unlimited funds...just a nice compromise!)
If you haven't ordered from D. Lawless Hardware before, you will thank me. Let's just say they are VERY reasonably priced for the high quality of their products. (Disclaimer: I've spent many hours on their website.) I've been using their hardware on furniture for a while and LOVE it! You're welcome! I wasn't originally planning on replacing the hinges on my cabinets. They seemed to be dark bronze-ish. And I didn't want to paint them (painted hinges don't wear well over time). And I personally like it when the cabinet handles & knobs coordinate with the hinges (if they are showing). So I chose Venetian Bronze handles and matching knobs with a little bit of copper showing through. Eventually, I realized the original hinges didn't match, so I replaced them with new, inexpensive Venetian Bronze hinges (also from D. Lawless Hardware - thanks, guys!). My advice for choosing materials: 1. Get samples of everything, and look at them in different lighting in the room you are making over. Lighting is EVERYTHING! Make sure you like them during the day AND at night. Make sure they still "match" in different lighting. And keep in mind what colors and textures will be touching each other. You don't want to get dizzy when you look at them. 2. Also if you are trying to save money, shop around for materials. Learn which materials are "high end" and "low end" and find materials that fit your budget. You'd be surprised what you can find on sale! Most of all KEEP IT SIMPLE! And have FUN! 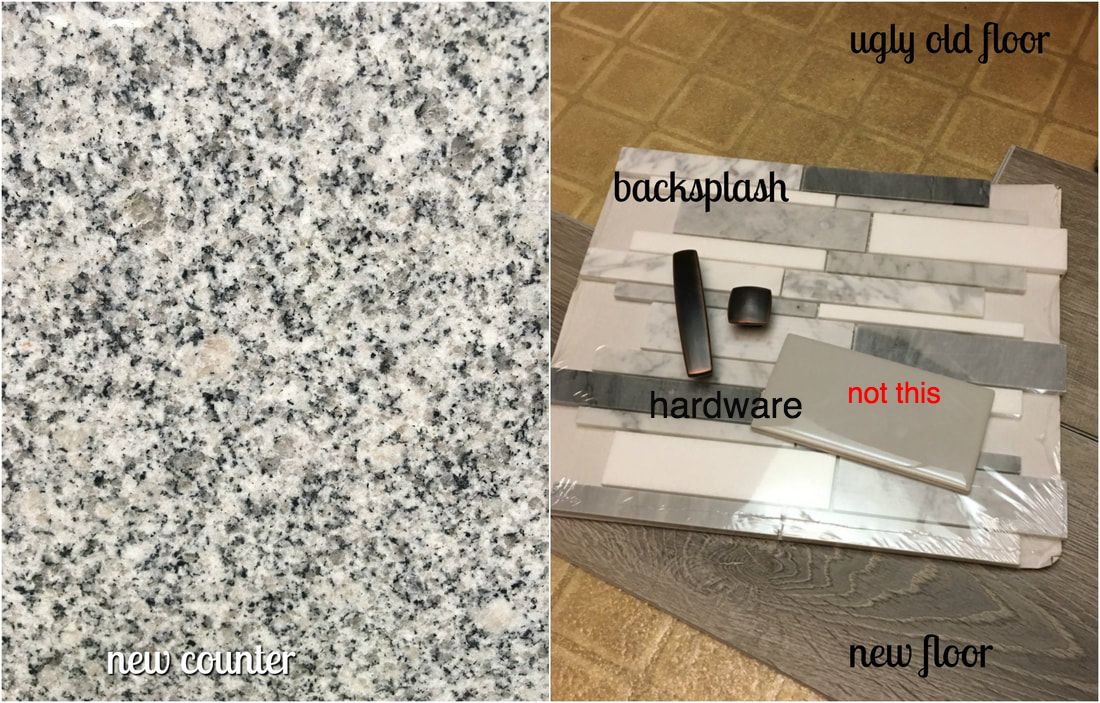 Next up: The (tiny) budget...
|
AuthorThis is Rachel's blog about our adventures in bringing The Artistic Home Studio & Boutique to life. Archives
August 2019
|
 RSS Feed